Around New Year’s I took the time to finally bring a new Sensirion SHT35 temp/hygro sensor online. It’s an upgrade compared to the SHT31 sensor chip Davis uses for their Vantage Pro 2. On top of it being more precise (+/- 0,1 C in stead of 0,3 for the SHT31) it also registers an extra decimal.
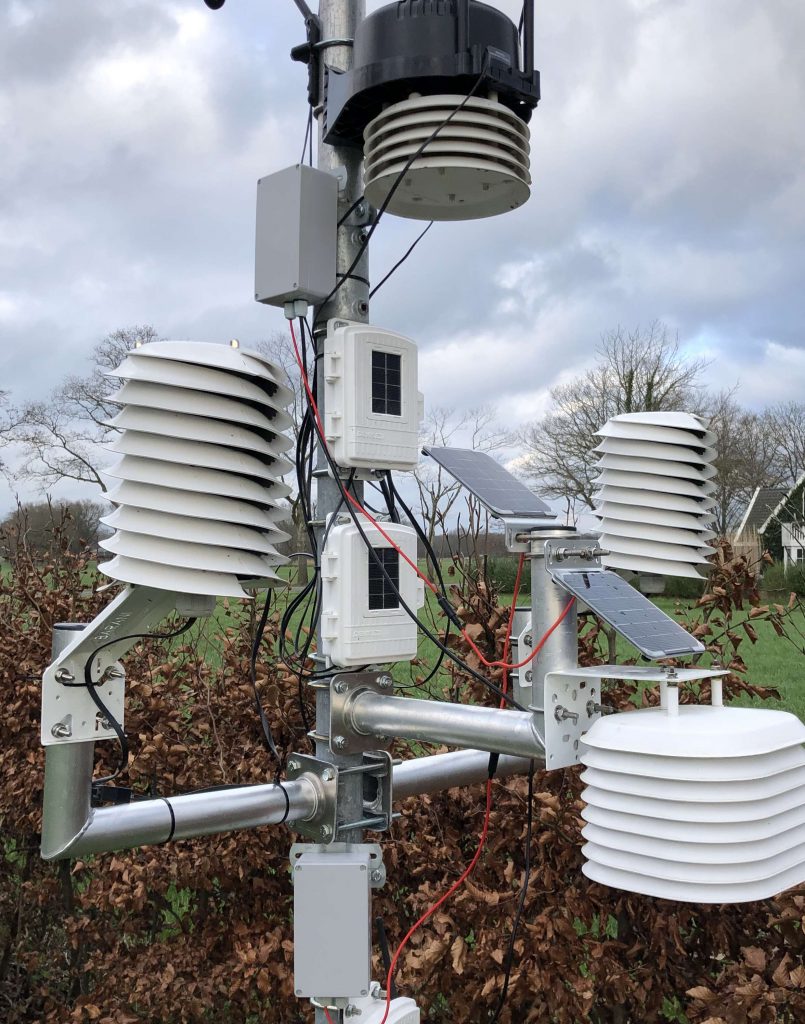
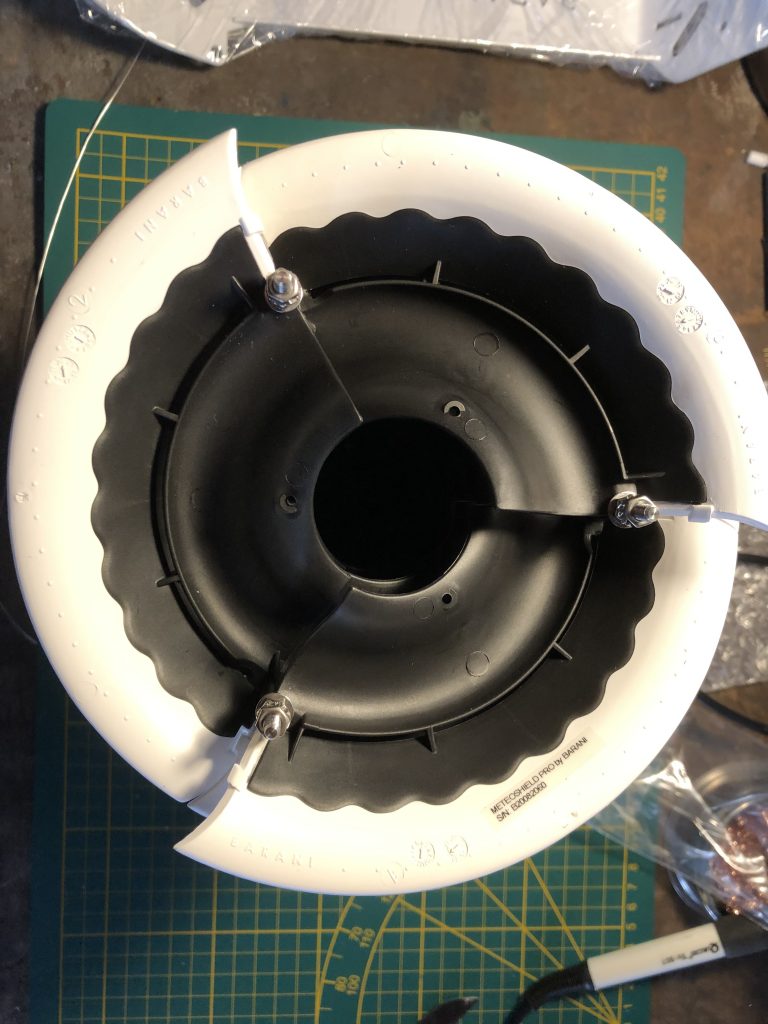
An extra reason I wanted to go for this is the fact that the SHT35 is available as a sensor probe that fits better into the Barani MeteoShield Pro that I have been using. A modified SHT31 inside the Barani shield has been my primary sensor since August 2020. This works, but is sub optimal. The shield is designed so that a cylindrical probe can be easily inserted, tightened and removed from the bottom. That shape would also be least disruptive for the air flow inside the shield.
An SHT35 inside such a cylindrical probe casing is available from various Chinese sellers, but Amazon also has them on offer here in the Netherlands. These probes are pretty short though, and to get them properly into place at the correct height, I used two pieces of plastic tubing and some tape.
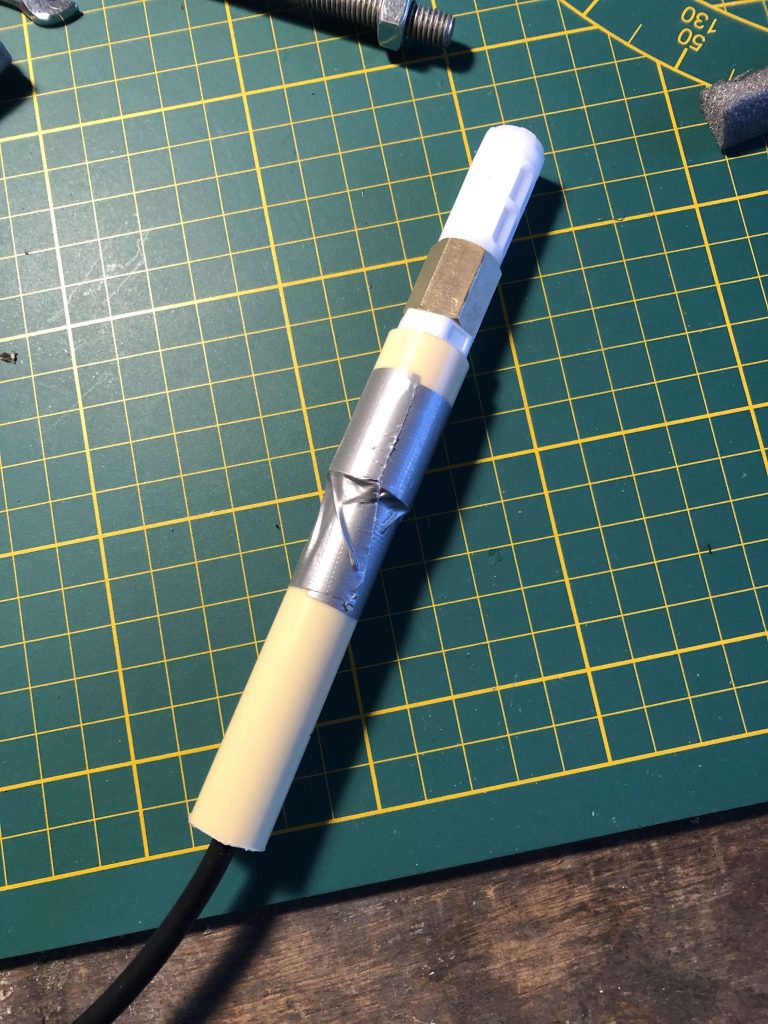
This will just fit through the default sensor clamp of the MeteoShield, which is a simple cable gland. (The MeteoShield happens to come with a type of foam packaging which is ideal to fit inside the tube and keep the cable in place.)
Now the more complex part of the whole operation is the fact that the SHT35 has an I2C interface, which cannot be hooked up to any Davis Instruments transmitter. Perhaps there are more solutions out there, but I quickly opted to explore the Arduino micro controllers for this purpose. Specifically, the Arduino compatible Wemos D1 Mini. This is a cheap, WiFi capable board, which is more than up for the task of periodically reading the sensor and relaying the data to my server.
For a first timer, challenges along the way involved:
- Soldering! The Wemos board and the sensor will have to be linked together. Soldering headers onto the board is the bare minimum to get this done. Since I had never done this before, I had to begin at the very start: getting my own soldering iron.
- Coding. The Wemos micro controller needs to know what it should do. Since I’m a professional software engineer, I wasn’t too worried about this one. I used the Arduino IDE to write (copy) the required code blocks.
- Power. There are tons of articles on the internet exploring the ways you can run the D1 Mini on battery power for a long time. Often these examples involve sensor readouts with an interval of 5 minutes or more. Obviously, this is not acceptable for a thermometer. I decided on an interval of 30 seconds. I now have a setup that should allow the D1 to run for nearly a month on 1 battery without solar panel backup. I’ve a included a fairly overpowered panel to extend this indefinitely. It’s not cheap. But I like the fact Voltaic offers mounting brackets that work perfectly for my setup and that the panels aren’t supposed to break down on me like some of the cheap Chinese options likely will.
As of February I’m confident enough with my setup that my primary sensor is now an SHT35 inside a MeteoShield. It will still have to prove itself in the long term. Right now, we’re entering a serious cold spell here in the Netherlands, so I will be able to see how it all holds up under (hopefully) temperatures near or below -20C. When I’ve done more monitoring on battery behavior and haven’t encountered any failures, I will write a post to share my exact setup.