
The Davis Vantage Pro 2 display is quite a bulky thing. I’ve added non-Davis sensors to my setup, and included a Davis AirLink in October too, which is WiFi based and not visible on the console. Plus, my console has been partially broken for a while. 🙂 Reason enough to look at an interesting alternative: building my own.
I decided to start out with a small proof of concept. A small display that shows the current temperature of my weather station. For this project I used the following components:
- Wemos D1 Mini Pro micro controller (AliExpress)
- A small OLED screen with an I2C interface (AliExpress)
- Some jumper cables (Amazon.nl)
- A micro USB cable and compatible power supply (5V).
Of course, using this as a console would mean placing the display and micro controller in some kind of casing. I haven’t made any choices on that subject, and may not even bother if I opt for a larger screen for the final product.
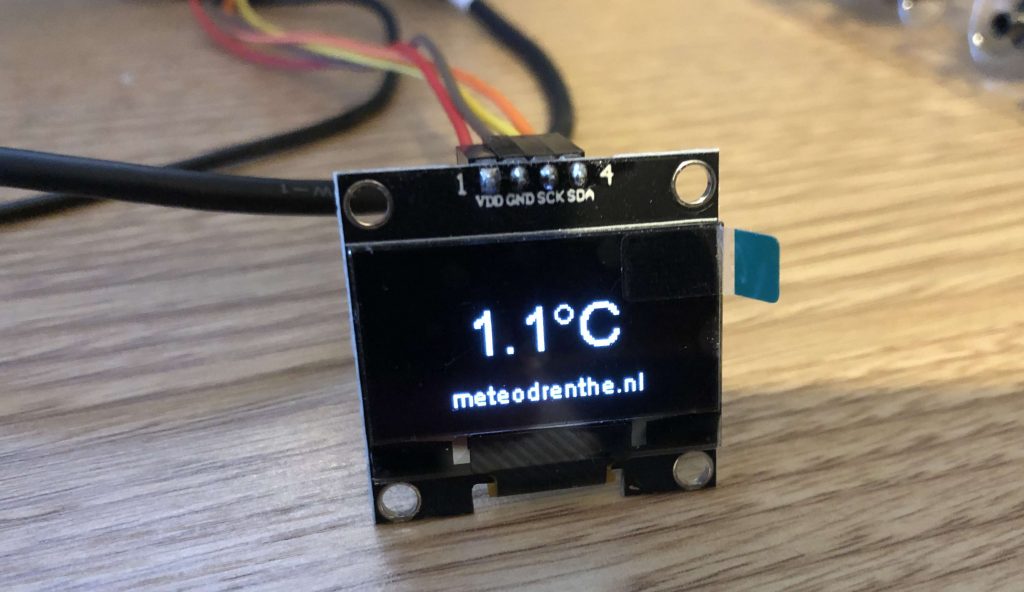
In terms of the hardware, all that is required is soldering some headers onto the Wemos D1 and connecting it to the pins of the OLED. In my case, that means connecting the 4 pins on the display like this:
VDD (power) to the 3.3v or 5v pin;
GND (ground) to the G pin;
SCK (SCL) to D1;
SDA to D2.
This is the simple part. Next, some code is required to do the following things:
- Properly interface with the display and send commands
- Connect to WiFI
- Send periodic requests for temperature data to the meteodrenthe.nl server
- Process the result and send it to the display
Connecting to the display
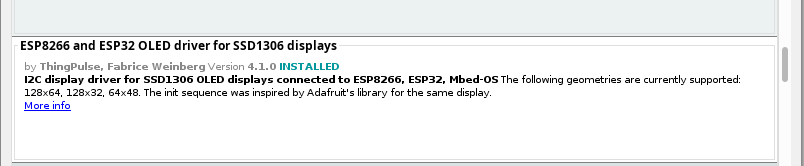
This part should be easy, since there are libraries available that should let you do this. My display requires SSD1315 driver. Searching for ‘SSD’ in the Arduino IDE library manager results in numerous hits, and Github offers options too. It is clear that libraries intended for the SSD1306 work too. Several options that should have allowed me to connect with the display resulted in errors. Ultimately, I settled on the ‘ESP8266 driver for SSD1306 displays’ by ThingPulse. It works well with the Wemos D1 Mini Pro (which has an ESP8266 chip).
The library includes a couple of examples that should illustrate how it works. As per those examples, the simplest case involves the following snippet.
#include "SSD1306Wire.h"

SSD1306Wire display(0x3c, SDA, SCL);

void setup() {
  display.init();
  display.flipScreenVertically(); // optional
  display.setFont(ArialMT_Plain_10);
  display.drawString(10, 16, "Hello world!");
}
The setup function initializes the display, optionally flips the screen, sets the font size and draws the string “Hello world!” on the display. Note that the values 10 and 16 in the drawString function are the x and y coordinates. As for the font, there are 3 default font types available, ArialMT_Plain_10 and two more for font size 16 and 24 respectively.
Connect to WiFi
Before we do anything else with the display, we need to know what we want to display. In my case, I retrieve current weather data from my server.
Connect to WiFi first.
#include <ESP8266WiFi.h>

const char* ssid = "<YOUR_SSID>";
const char* password = "<YOUR_WIFI_PASSWORD>";

void setup() {
  Serial.begin(115200);
  connectToWiFi();
}

void connectToWiFi() {
  WiFi.begin(ssid, password);
  while (WiFi.status() != WL_CONNECTED) {
    delay(500);
    Serial.print(".");
  }
  Serial.print("Connected to ");
  Serial.println(ssid);
  Serial.print("IP: ");
  Serial.println(WiFi.localIP());

  Serial.print("Signal strength: ");
  Serial.print(WiFi.RSSI());
  Serial.println(" dBm");
  Serial.println("");
}
This code calls the connectToWiFi function, connects using the supplied ssid and password values and prints relevant values. These are optional, of couse.
GET the temperature data
Next we need to get the actual data. An HTTPS GET call looks like this.
#include <ESP8266HTTPClient.h>
#include <ESP8266WiFi.h>
#include <ArduinoJson.h>

HTTPClient http;
WiFiClientSecure client;
DynamicJsonDocument doc(1024);

void getData() {
  client.setInsecure();
  client.connect("api.meteodrenthe.nl", 443);
  http.setFollowRedirects(true);
  http.begin(client, "<RESOURCE_URL>");
  http.addHeader("Content-Type", "application/json");

  int httpCode = http.GET();

  if (httpCode == HTTP_CODE_OK) {
    Serial.print("HTTP response code ");
    Serial.println(httpCode);
    String response = http.getString();
    Serial.println(response);

    deserializeJson(doc, response);
    JsonObject obj = doc.as<JsonObject>();

    double temperature = obj["temperature"];
    String tempString = String(temperature, 1) + "°C";

    //do something
  }
  http.end();
}
This function connects to my server using HTTPS (port 443). Before it does, though, it calls setInsecure on the WiFiClientSecure instance. There is no other reason for this than that I have not been able to get it work otherwise. I feel this solution is acceptable as I am not doing anything remotely sensitive. As you can note, I begin my HTTP request by calling http.begin and passing the client along with the RESOURCE_URL, which in my case is an endpoint available on my server. Adding the header specifying the content type is, now I look at it, a remnant from a POST example, and I’m not really sure if it would matter excluding that line. It can’t hurt either.
Calling http.GET() will execute the actual request. The function returns and HTTP status code. If the request succeeded, the result should be HTTP_CODE_OK (= 200). Since I’m returing a relatively complex json structure, I decided to use ArduinoJson to deserialize the string. The resulting JsonObject can be used to easily retrieve values from the result. In this case obj[“temperature”] returns the temperature value I am looking for. After reducing it to 1 decimal point precision and concatenating “°C”, I can display the result.
This is the final sketch, which queries the server once a minute and displays the result.
#include <Wire.h>               // Only needed for Arduino 1.6.5 and earlier
#include "SSD1306Wire.h"
#include <ESP8266WiFi.h>
#include <ESP8266HTTPClient.h>
#include <ArduinoJson.h>

SSD1306Wire display(0x3c, SDA, SCL);   // ADDRESS, SDA, SCL  -  SDA and SCL usually populate automatically based on your board's pins_arduino.h

const char* ssid = "<YOUR_SSID>";
const char* password = "<YOUR_WIFI_PASSWORD>";
HTTPClient http;
WiFiClientSecure client;
DynamicJsonDocument doc(1024);

void setup() {
  Serial.begin(115200);

  connectToWiFi();

  display.init();
  display.flipScreenVertically();
}

void connectToWiFi() {
  WiFi.begin(ssid, password);
  while (WiFi.status() != WL_CONNECTED) {
    delay(500);
    Serial.print(".");
  }
  Serial.print("Connected to ");
  Serial.println(ssid);
  Serial.print("IP: ");
  Serial.println(WiFi.localIP());

  Serial.print("Signal strength: ");
  Serial.print(WiFi.RSSI());
  Serial.println(" dBm");
  Serial.println("");
}

void drawTemp() {

  client.setInsecure();
  client.connect("api.meteodrenthe.nl", 443);
  http.setFollowRedirects(true);
  http.begin(client, "<RESOURCE_URL>");
  http.addHeader("Content-Type", "application/json");
  int httpCode = http.GET();
  if (httpCode == HTTP_CODE_OK) {
    Serial.print("HTTP response code ");
    Serial.println(httpCode);
    String response = http.getString();
    Serial.println(response);

    deserializeJson(doc, response);
    JsonObject obj = doc.as<JsonObject>();

    double temperature = obj["temperature"];
    String tempString = String(temperature, 1) + "°C";

    display.setTextAlignment(TEXT_ALIGN_CENTER);
    display.setFont(ArialMT_Plain_24);
    display.drawString(64, 16, tempString);
    display.setFont(ArialMT_Plain_10);
    display.drawString(64, 48, "meteodrenthe.nl");
  }
  http.end();
}

void loop() {
  display.clear(); // clear display each loop

  drawTemp();

  display.display();

  delay(60000);
}