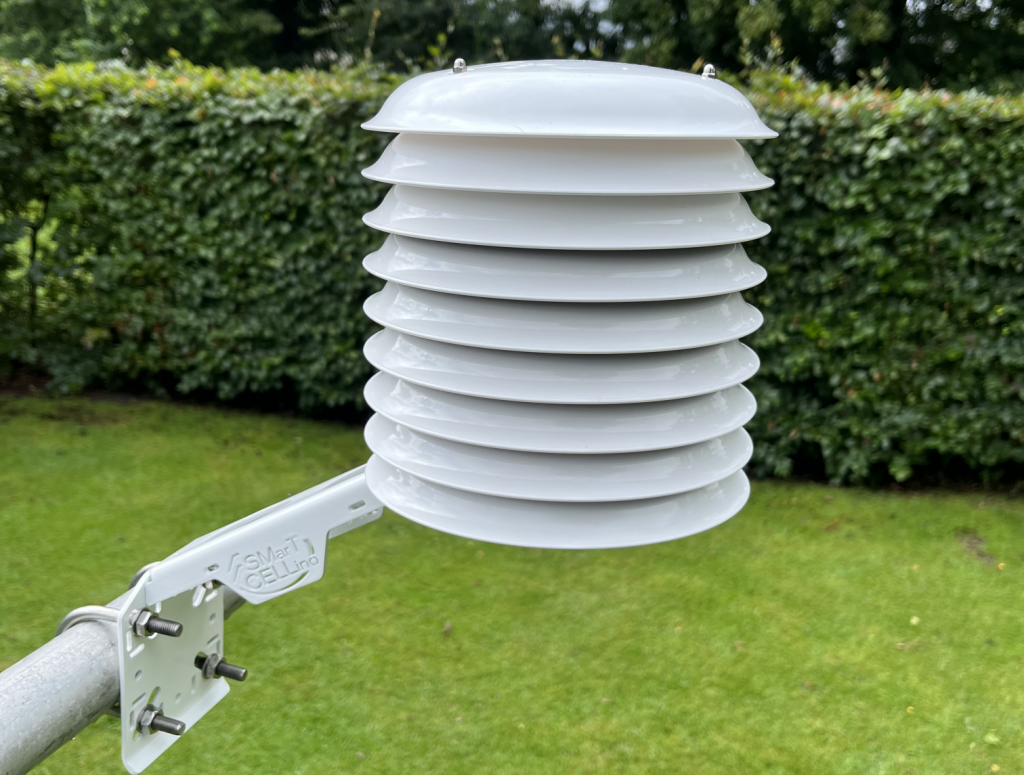
It’s Summer. A good excuse to get a new radiation shield. Earlier this month I received a new model from SIAP+MICROS: the SMarT CELLino. As the linked article mentions, the shield is created as a collaboration between the Italian company and Marcellino Salvador. That explains the name of the product. Most of it anyway. 🙂
This post is an unboxing of the radiation shield. I will get to my impression of its performance versus some of my other shields on another post. Let’s start off with a picture of the content of package.
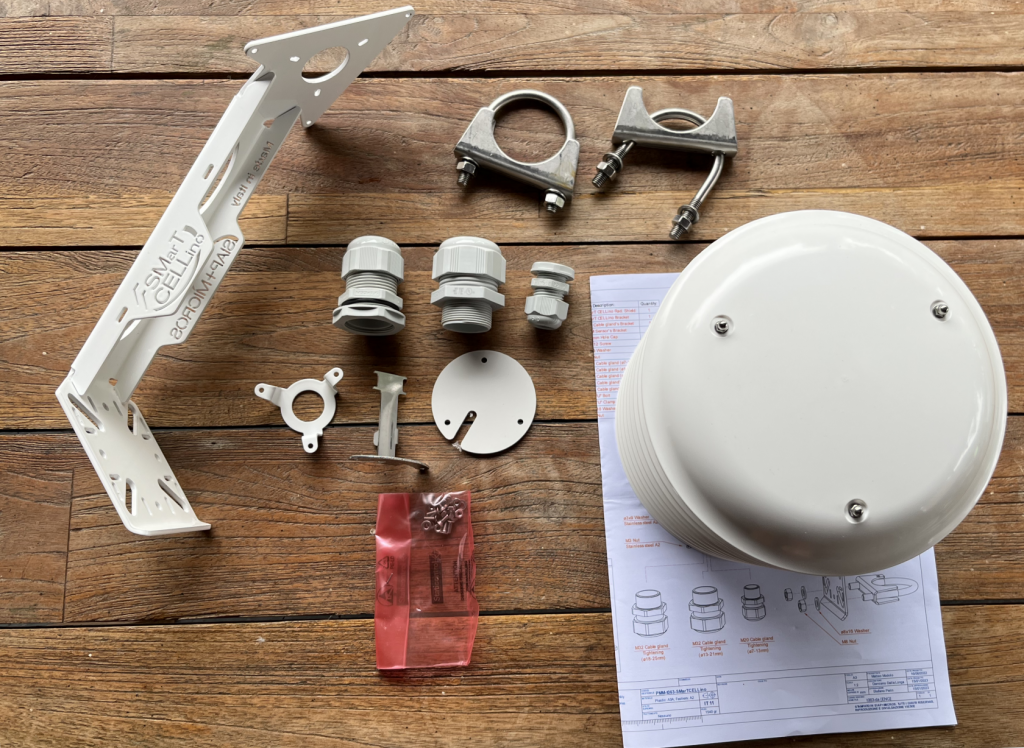
Compared to most other shields I’ve got, there’s quite a few things there. You’ve got your shield and mounting bracket, of course. Then there are multiple cable glands and sensor mounting solutions present as well. This should allow for pretty much any sensor to be mounted inside the shield. Each option has a description in the supplied manual. Two M8 u-bolts with an inner diameter of roughly 53 mm are present as well. This is a nice addition. You can never have enough u-bolts.
Here is a bottom view of the shield.
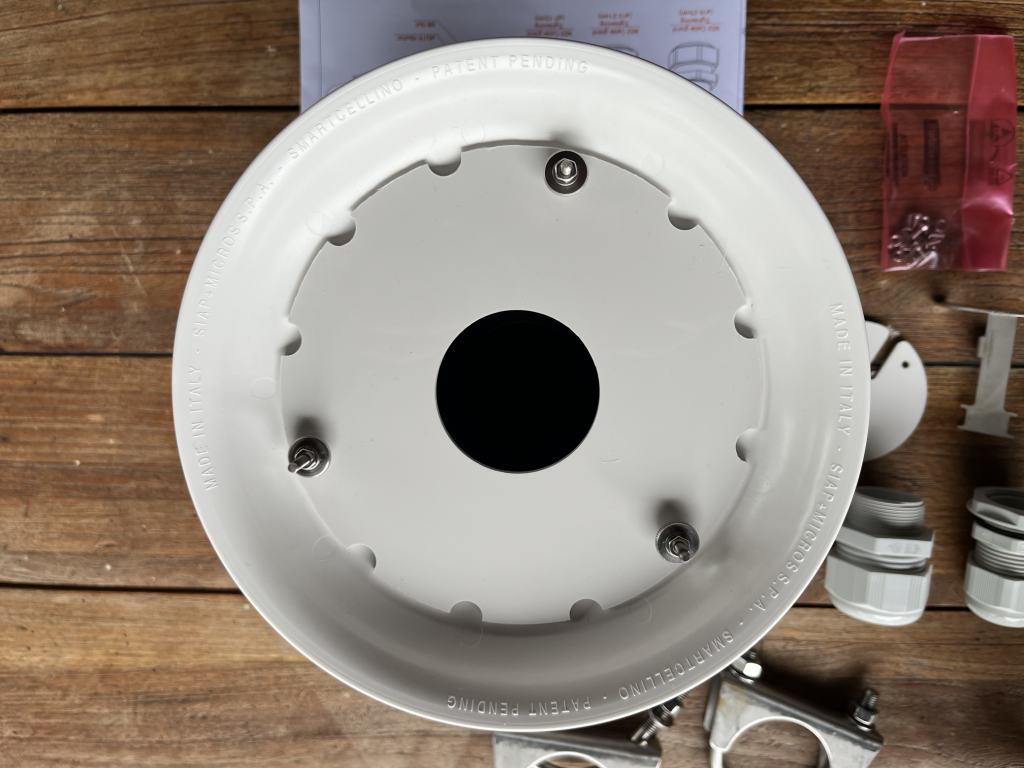
The whole thing is kept together by 3 bolts. Unfastening those allows you to take the entire shield apart plate by plate quite easily, making it possible to clean it inside and out. One question is going to be if and when that is necessary. How will the shield look at the end of a long and humid Dutch winter by next April or so? Something to look into at a later time.
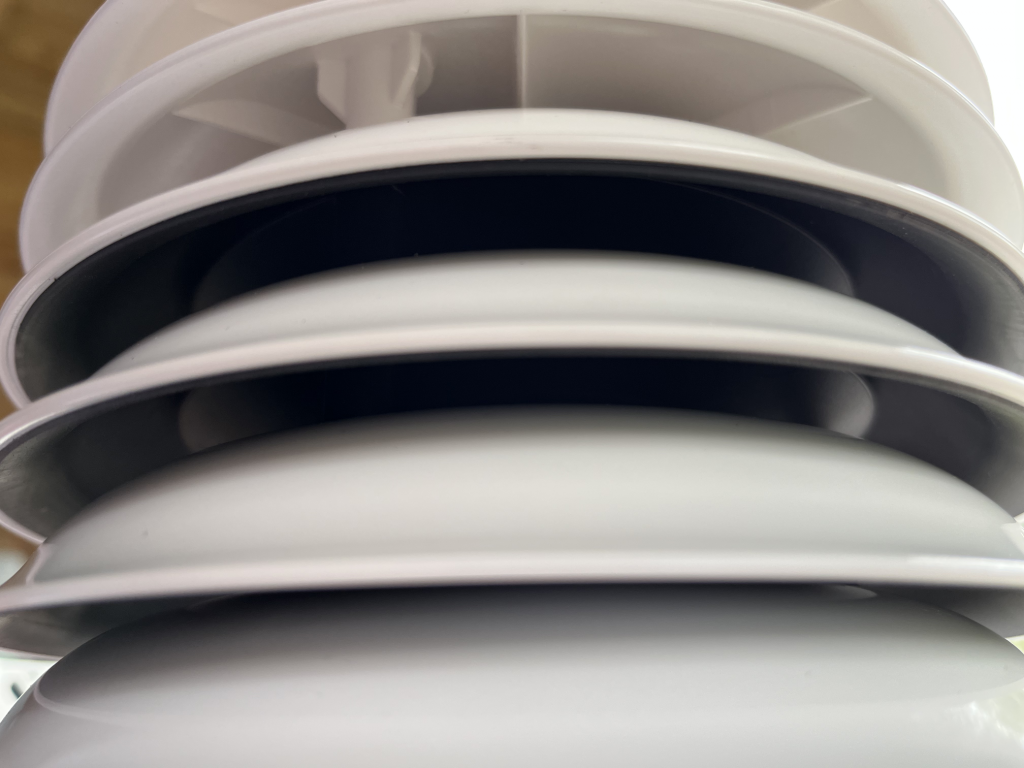
When we take the bottom plate off, we can see the matte black surface you expect from any half decent shield.
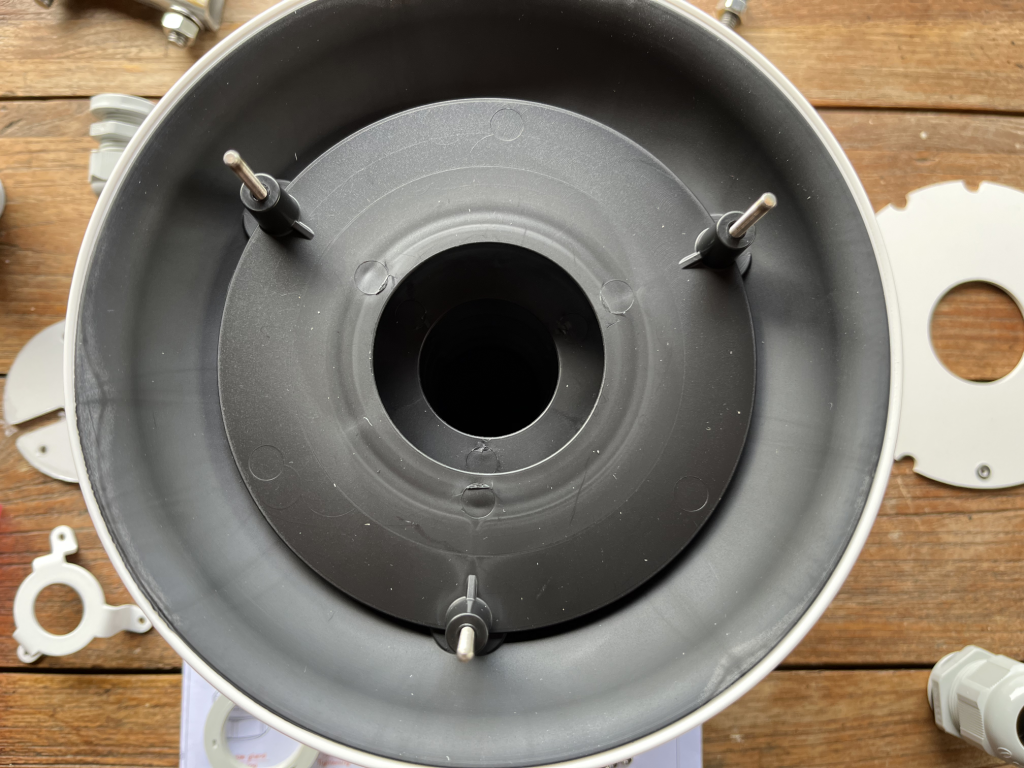
The sensor chamber ends two plates from the top. The top two plates are white on the inside and out.
The manual describes the optimal height of the sensor:

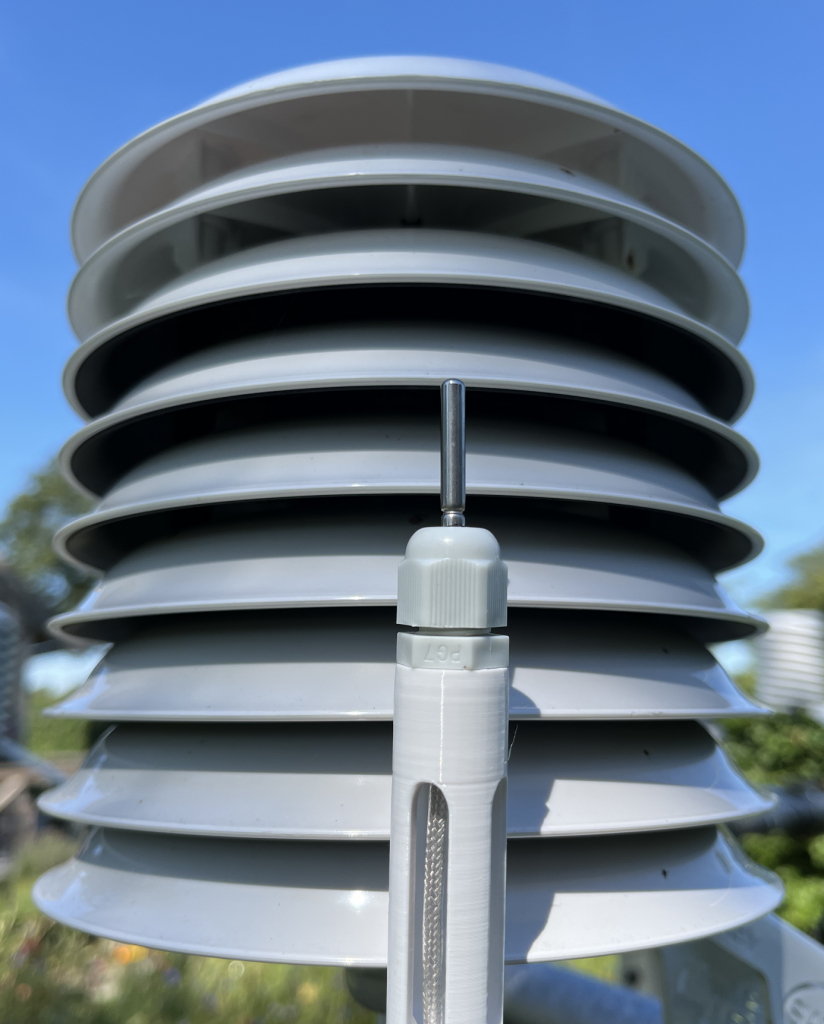
The distance between the cable gland and the optimal height was a bit too much for the sensor holders I was using. Luckily, I could change the existing design and extend them a bit and reprint using a white PETG filament to accommodate the SMarT CELLino as well as the Barani MeteoShield Pro. 3D printers are such convenient devices to have in such instances.
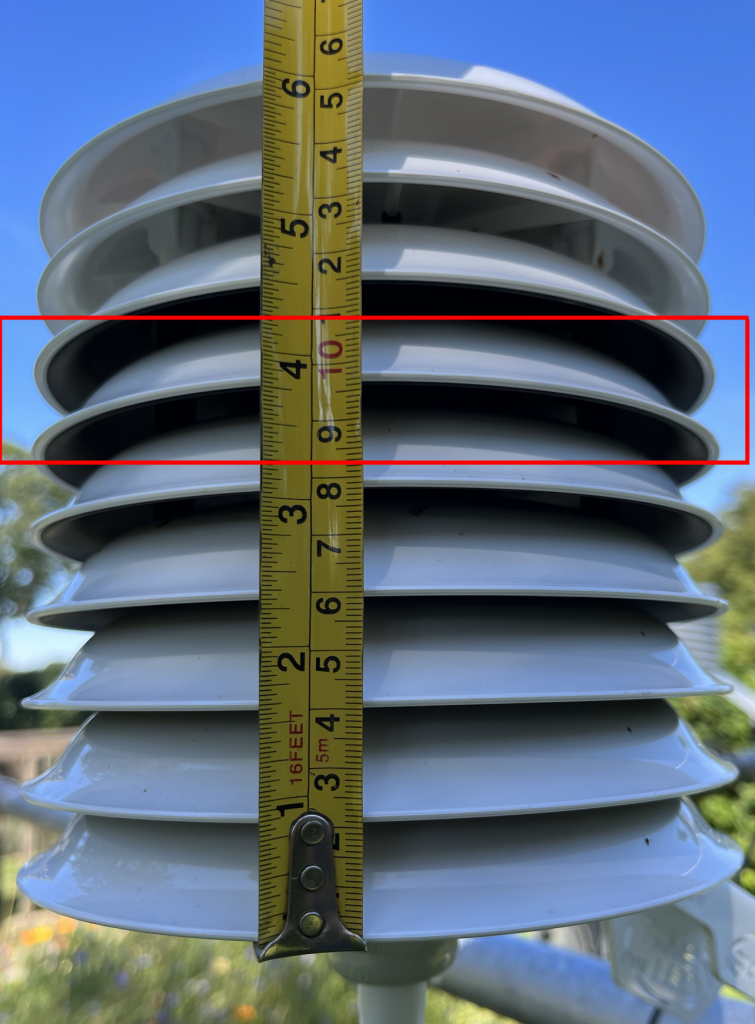
Based on the manual, the ideal placement of the sensor would be somewhere 8 and 10 centimeters from the mounting plate. Looking at the schematic picture, you would think that is somewhere around the 4th plate. If we take a measuring tape, taking into account that the bottom plate actually extends a bit lower than the mounting plate, optimal sensor placement is located somewhere between the 5th plate and 6th plate.
So what is my first impression? I do not have any serious expertise in gauging its potential performance just by looking at it. For sure it checks all the obvious boxes. Your white glossy exterior, matte black interior. The aforementioned post or the brochure for the shield don’t mention any features that would specifically set it apart from similar products in the market. It looks and feels like a decent product. I especially like how all the necessary accessoires were supplied. No need to come up with mounting solutions after you receive it. The real question of course it: how does it perform?
In my current setup, I will be comparing the SMarT CELLino, the Barani MeteoShield Pro Gen 3 and the MetSpec RAD14, as well as the Gen2 and FARS prototype versions of the MeteoShield and Apogee TS-100 FARS model. July and August are great months to be doing this. Since all passive shields suffer badly when natural ventilation (a.k.a. wind) drops away entirely in high solar radiation, I won’t so much be interested in comparing with the FARS models. What interests me more is what happens when wind drops below 1 m/s and especially the (what I have observed as) critical point of 0,5 m/s. The MeteoShield by Barani Design has always edged ahead of any other passive shield I have tried to date. Perhaps this shield by SIAP+MICROS will be able to challenge that position. More to come. 🙂